Embarking on a staining project can transform any wooden surface, enhancing its natural beauty and extending its lifespan. However, achieving a flawless finish requires not just the right stain but also the right tools. Among these, the stain pad applicator stands out as an indispensable asset for DIY enthusiasts and professionals alike. With its ability to deliver even coverage and smooth application, understanding how to master this tool can significantly elevate your staining results.
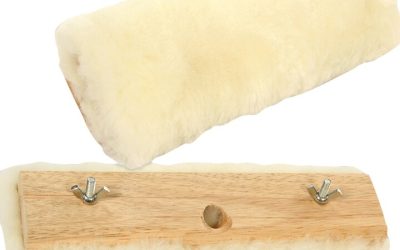
Why Choose a Stain Pad Applicator?
The choice of a stain pad applicator is pivotal in achieving a pristine, uniform finish. Here are several reasons why it is favored over traditional brushes and rollers:
• Smooth Application: Stain pad applicators are designed to glide smoothly over surfaces, minimizing streaks and blotches that can occur with brushes.
• Efficient Coverage: The pads can hold a significant amount of stain, allowing for more extensive coverage in a single pass compared to brushes.
• Versatility: They are suitable for a variety of surfaces, including flat and contoured areas, making them ideal for complex projects.
• Control: The applicator offers excellent control, allowing users to apply the right amount of pressure and stain for a consistent finish.
For those interested in learning more about the nuances of using a stain pad applicator, understanding its benefits can enhance your staining projects.
Tips for Using a Stain Pad Applicator
Maximizing the potential of your stain pad applicator involves following a few essential steps:
1. Preparation: Before starting, ensure that the wooden surface is clean, dry, and free from any old finishes or debris. Sand the surface if necessary to create a smooth base for the stain.
2. Choosing the Right Pad: Select a pad suitable for the type of stain and surface. Some pads are designed specifically for oil-based stains, while others work better with water-based products.
3. Application Technique:
• Loading the Pad: Dip the pad into the stain, allowing it to absorb the product without overloading. Excess stain can lead to drips and an uneven finish.
• Even Strokes: Apply the stain with long, even strokes, following the wood grain. This technique helps in achieving a consistent look and prevents lap marks.
• Edge Handling: Use the edges of the pad to reach corners and detailed areas, ensuring comprehensive coverage.
• Maintenance: After use, clean the pad thoroughly according to the stain type. Proper maintenance ensures the applicator remains in good condition for future projects.
Common Mistakes to Avoid
While using a stain pad applicator is relatively straightforward, avoiding common pitfalls can enhance your results:
• Overlapping Strokes: Ensure each stroke slightly overlaps the previous one to prevent visible lines.
• Rushing the Process: Allow each coat to dry completely before applying additional layers. Rushing can lead to an uneven finish.
• Ignoring the Manufacturer’s Instructions: Always follow the stain manufacturer’s guidelines for drying times and application methods for optimal results.
Mastering the art of staining with a stain pad applicator can significantly enhance your woodworking projects, providing a professional-grade finish with minimal effort. By understanding the benefits and proper techniques associated with this tool, you can achieve a beautiful, even stain that highlights the natural beauty of wood. Remember to choose the right pad, apply the stain carefully, and maintain your tools to ensure your projects consistently meet your expectations. With these insights, you are well-equipped to tackle any staining project with confidence and finesse.